A short video to show the results on the previously shown "perfect" bound Bible.
Monday, August 27, 2012
Reinforcing a "perfect" bound Bible
In this video I illustrate the process of repairing and reinforcing a "perfect" bound Bible which has begun to come apart.
Tuesday, May 1, 2012
Upcoming Projects
In this short video I talk about upcoming binding project I will be working on. In coming videos I'll show the completed Bibles/books.
Cloth re-back / Bible breakup
In this video I show a recent cloth reback and describe the work done. I also describe my next project which is a breaking up of a Bible into two volumes.
The Making of Raised Bands on Bibles
In this video we demonstrate the process I use from start to finish to create raised bands on the spines of leather Bibles.
Friday, May 6, 2011
Bookbinding Equipment
In this short video I take a quick look at some of the bookbinding equipment I have and use.
Tuesday, April 26, 2011
Tools of the trade
In this video I take a quick look at some of the small tools I use when working on books. This is by no means all of the tools that I have, but a look at some of the more basic tools every bookbinder would need.
Introducing myself!
FINALLY I'm getting around to uploading some videos that might be of interest to aspiring bookbinders. This one is just a general introduction to myself and my bookbinding background.
Tuesday, April 12, 2011
Upcoming projects

Here are some of the projects that I have to work on in the coming weeks. Seems like each project I work on has something challenging about it. Among these books and Bibles I have the challenge of another bar snap binding, another "Yapp" binding, and restoring an important WWII book with full photos as endpapers, among other things. Taking on new things is how we learn so I guess I am in the midst of expanding my skills even further.
I am slowly trying to put together some videos to highlight my little shop and some of the procedures that I use in my work. I hope to make those available soon. If there is anything in particular you would like to see demonstrated, just let me know.
For Tyler

This Bible came to me through binder in Florida. The owner wanted to have this Bible rebound to give to his daughter. As you can see the leather cover was in a state of disrepair beyond any simple fixes. You can also see how the leather hangs over the edges of the book more than usual. This is called a "Yapp" binding. It was designed to help protect the edges of the book. They measured 1/2".


You can see in the finished job that we were able to create a nice black goatskin cover with the same 1/2" overhang all around. Two blue ribbons were also used. You can also see something unusual and special that we did at the owners request. He wanted us to preserve the original front cover of the old leather binding by gluing it to the inside of the new front cover. The Bible is being given to his daughter and he wanted her to always be reminded that it was once his.
For Hannah

This Bible had a hardback covered in a soft black paper and a black elastic band to hold it closed when not in use. The spine was gone. The book block itself was in good condition, requiring no special work before rebinding.

As you can see we have created a nice flexible leather binding, brown in color, with two ribbons, one cream colored and the other brown. I will also be supplying her with a strip of the same leather for her to create her own tie to keep it closed when being transported, should she feel it is needed.
Wednesday, March 9, 2011
Old Bible


This is a small (3.5" x 5.5") Bible that is a treasured heirloom. It has been carefully stored for the past 40 years, waiting for something to be done that would allow family members to handle it. There is nothing to indicate just how old the Bible is but it is clearly old. The threads used in sewing the signatures together were so old and brittle that the book block was in a couple of pieces and it didn't take much for more sections to come off. Thus the Bible had to be taken completely apart and re-sewn.

After re-sewing the Bible I then created a new flexible cloth cover using a black cloth with a pebbly grain to it. There was no lettering to be done to this binding since we wanted to reapply as much as possible of the old decoratively stamped cloth cover on top of this new cover.

Here you can see the finished book. The new binding provides the needed strength and stability while maintaining the appearance of the original binding.
Thursday, January 20, 2011
Large Family Bible

As you can see books can be in all sorts of condition when you get them in. This large family Bible is heavy but the owner carries it and uses it at church. Both the front and back boards were separated from the Bible because of inadequate joint material, with the spine section of the cover only held to the front board by strapping tape. The original boards were covered in black cloth and slightly padded. Thankfully the book block itself was in fairly good condition. It actually is a "perfect" bound book with side stitching that goes through the entire thickness of the book. I removed the side stitching to replace both the endpapers and cloth for the joint. These were then sewn back onto the book as I replaced the side stitching with new linen thread.
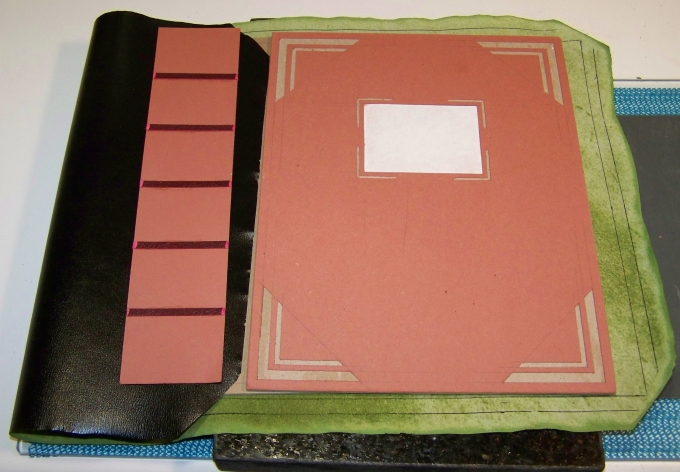
Above I have pictured the black cowhide used to cover the new boards. You can see the leather was cut to size and the edges pared just enough to make a smooth transition under the endpapers. You can see the new spine liner with fake raised bands of leather in place. These raised bands give the spine a nice look and feel. You also see a bit of elaborate work on the front cover board. Rather than have one large expanse of plain black leather I decided to put some design work in place that will show through the leather and give it a nice look. I'm currently unable to do the fancy gold work typical of many family Bibles so decided this would be a good way of making it look a bit nicer. It will produce the opposite affect as the raised bands on the spine since these are recessed areas.

The picture above is of the case after it had been put together. You can see the affect of the raised bands on the spine and the recessed areas on the front cover.

This picture shows the finished Bible. It turned out pretty good! This new leather cover should last a very long time.
Tuesday, January 11, 2011
For Clara


I failed to take a before picture of this one. The book block itself was in good shape but the cover was just a cheap paper that had quickly fallen apart. She had used a lot of black tape to keep it usable. She also had used wide / clear packing tape to hold a couple of pages in place. I was able to remove the tape by using my wife's hair dryer on its hottest temperature. That softened the glue enough that I was able to gently remove the tape from the delicate Bible paper. I made the fore edge of the new black goatskin cover to overhang enough to provide some protection for the Bible book tabs she had added. I did this Bible in December, 2010.
For Jenny


As you can see this Bible had a curved spine. Unfortunately it was curved in the wrong direction! What you can't see is that it was FULL of dog ears (folds at the corners and elsewhere on a page). I think I had gone through a rather large part of the Bible, page by page, repairing these dog ears before I finally came across a page without any.


As you can see we were able to restore the Bible to a much more usable state. We were able to make the spine curve in the right direction, get all the dog ears out, and put a nice crimson colored goatskin on it. You can see it is very floppy. This job was finished in December, 2010.
For Patti

This little Bible presented me with a couple of challenges I had never faced before. First, it had a flap on it. None the Bibles I had done before (years ago) had a flap on them. I had to figure out how to construct the case with a proper flap. I was able to use the old case as a pattern for starters. The second challenge was the bar snap. I had never worked with snaps of any kind before. I first had to find where I could purchase new bar snaps. I bought the only ones I could find anywhere and they turned out to be rather cheap looking. I sent them to my uncle who is a jeweler and he was able to plate it in real gold. They came back looking really nice.

Here is the finished product. I used a crimson colored goatskin leather. Where do you stamp a persons name on a Bible with a flap? I chose to put it on the flap itself just below the new bar snap. Also, the lining on the inside of the flap itself (not shown) is made of the same leather pared down real thin. She was pleased with the results. This was done in June, 2010.
Saturday, January 8, 2011
For Curtis


This was a "perfect" bound Bible which I converted to a reinforced double fan glued Bible. It is bound in a really nice exceptionally floppy wine colored goat skin. It was done in April 2010.
For Richard


As you can see this Bible had not been well taken care of. I had to deal with more dog ears than I remember ever having to deal with before. It turned out to be a "perfect" bound Bible, meaning it was not a sewn book but just single sheets of paper with glue applied to the spine. I was able to get all the pieces back together and pretty well straightened out. I used black goatskin with new black Bible endpapers and a red ribbon. This Bible was done in February of 2010.
For Shelley


This Bible was rebound in a nice crimson colored goatskin with new maroon Bible endpapers and two ribbon markers (black/red). This Bible was done in February 2010.
Johnson's Notes


This was a commentary for my mother-in-law. The book block itself was in fairly good condition so only needed some minor repairs, new endpapers and a new cloth cover. I also drew a simple line with my bone folder around the front cover board to add a little to the look.
Subscribe to:
Posts (Atom)